
If your website's contact forms are getting spam, Google reCAPTCHA can help. It checks each form submission in the background and marks anything that looks like it came from a bot as spam. Visitors don't have to tick a box or solve a puzzle.
This guide is for websites that use the Gravity Forms plugin. If we look after your website on a maintenance plan, we can set this up for you. Just get in touch.
Before you start
- You'll need to be able to log in to your WordPress dashboard as an administrator.
- You'll need a Google account. Google allows up to 10,000 checks a month for free, which is plenty for most small websites.
Step 1: Create a reCAPTCHA key
- Go to Google Cloud's reCAPTCHA page and sign in with your Google account. If it's your first time, Google may ask you to create a project first. Follow the prompts on screen.
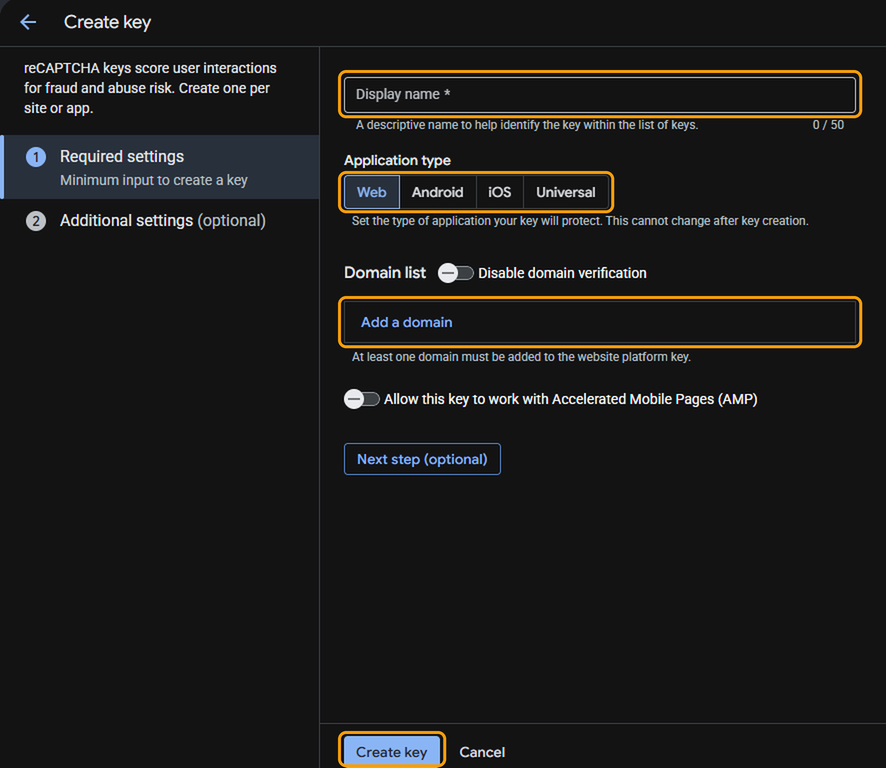
- Open the Keys tab and click Create key.

- Enter a Display name, such as your website's name.
- Under Application type, leave Web selected.
- Click Add a domain and enter your domain name without https:// or www, for example yourdomain.co.uk.
- Click Create key.
Step 2: Install the reCAPTCHA add-on
- In your WordPress dashboard, go to Forms > Add-Ons.
- Find the reCAPTCHA Add-On, then click Install and Activate.
Step 3: Connect your website to reCAPTCHA
- Go to Forms > Settings and click reCAPTCHA.
- Select reCAPTCHA v3 Enterprise and click Continue.
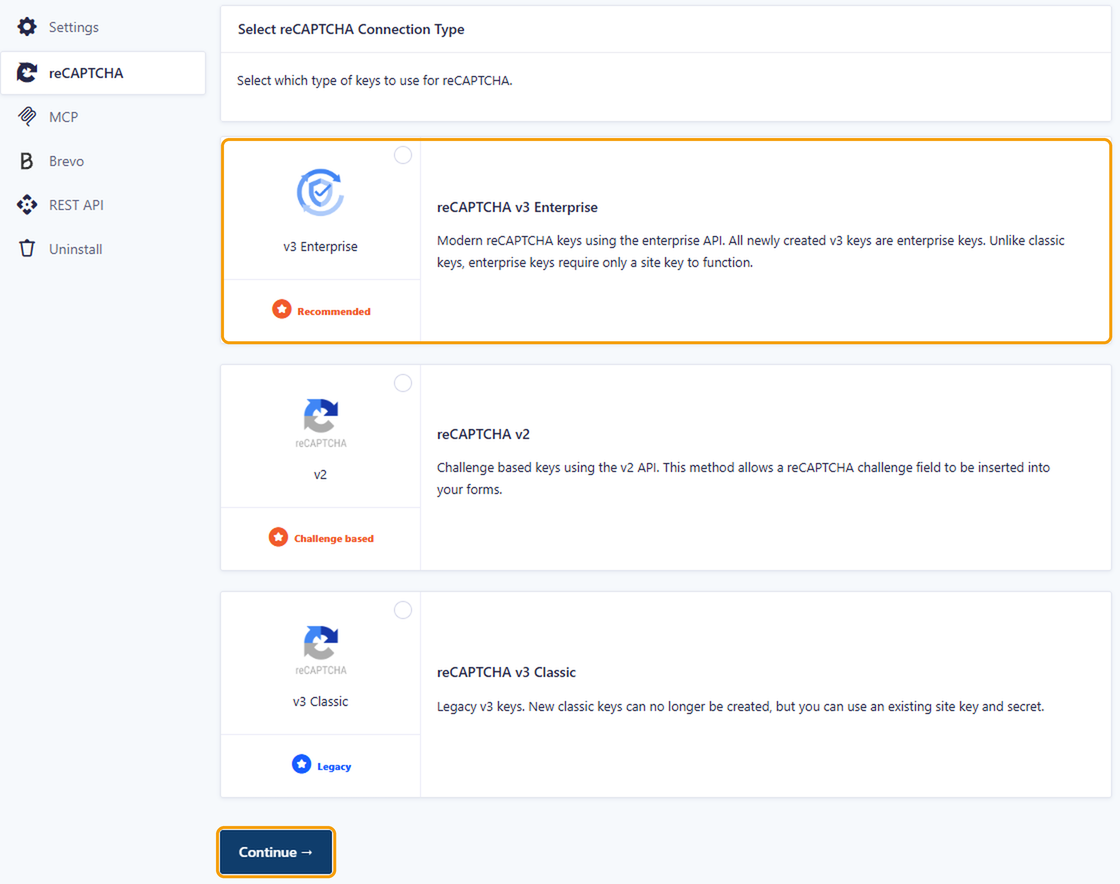
- Sign in with the same Google account you used in step 1 and allow access when asked.
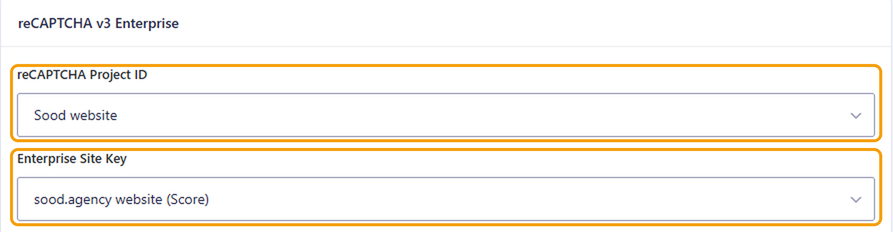
- Under reCAPTCHA Project ID, choose your project. Under Enterprise Site Key, choose the key you created in step 1. Then click Save Settings.
- Check that Enable reCAPTCHA by Default is switched on, and click Save Settings again.
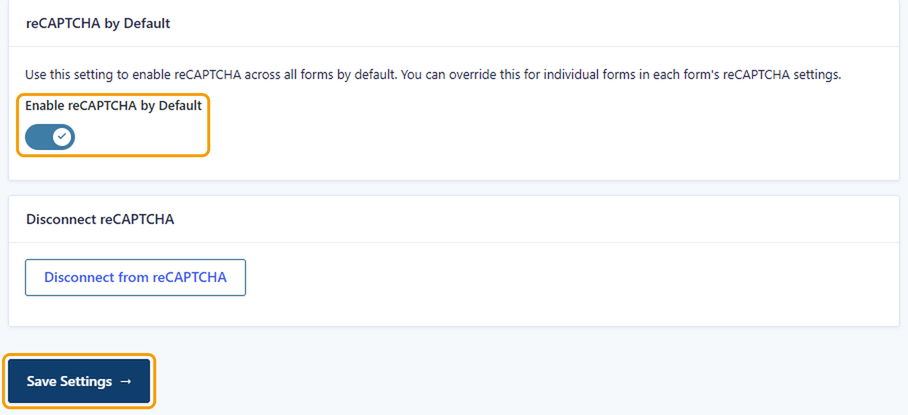
reCAPTCHA now checks every form on your website. You don't need to add anything to the forms themselves.
Step 4: Add a consent checkbox
A required consent checkbox makes sure people agree to your privacy policy before they send you their details.
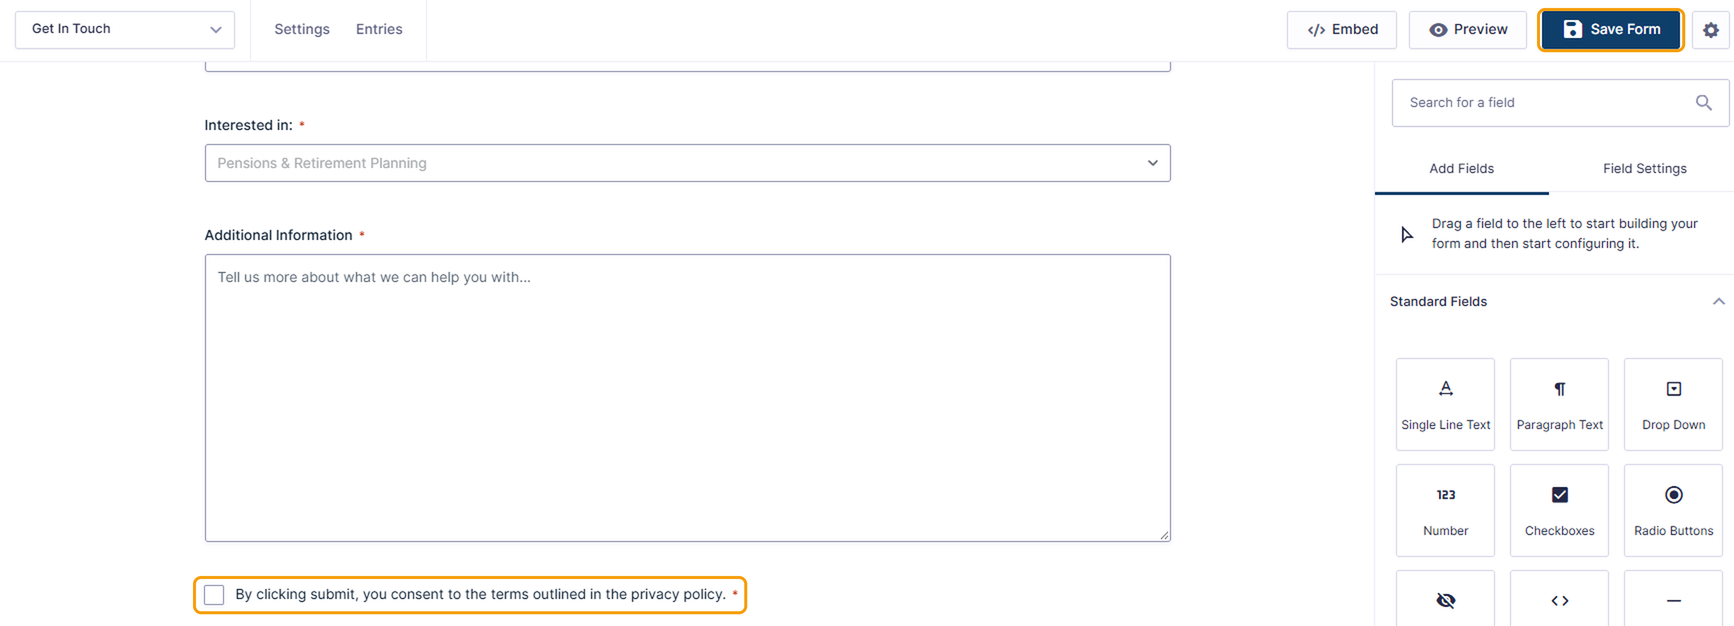
- Go to Forms > Forms, hover over your form and click Edit.
- Under Advanced Fields, drag a Consent field to the bottom of the form.
- Click the field and, in Field Settings, enter the checkbox text. For example: "I agree to my details being stored so you can reply to my enquiry." Link to your privacy policy in the description if you have one.
- Tick Required.
- Click Save Form.
Good to know
- Spam isn't deleted. It's kept in the Spam section of Forms > Entries. It's worth a quick look now and then in case a genuine message has ended up there.
- You'll see a small reCAPTCHA badge in the bottom corner of your website. That's normal and shows the protection is working.
- If you see a message asking you to reconnect, go to Forms > Settings > reCAPTCHA and sign in to Google again. This can happen with Google Workspace accounts.
- If your forms use the older CAPTCHA field, Gravity Forms is retiring it. Once the add-on is set up, you can remove that field from your forms.
If you get stuck, get in touch and we'll help.


