
A staging site is a private copy of your website where you can try out changes, such as updates, new plugins or a redesign, without affecting the live site your visitors see. When you're happy, you can push the changes to your live site.
A clone is a separate, permanent copy of your website, for example if you want to use an existing site as the starting point for a new one.
Both are done in WordPress Manager by Softaculous in cPanel. It's a good idea to take a backup first.
Finding your site
- Log in to cPanel. See How to log in to cPanel if you're not sure how.
- In the menu on the left, click WordPress Manager by Softaculous.
- Find your site in the list and click the arrow on the right of its row.
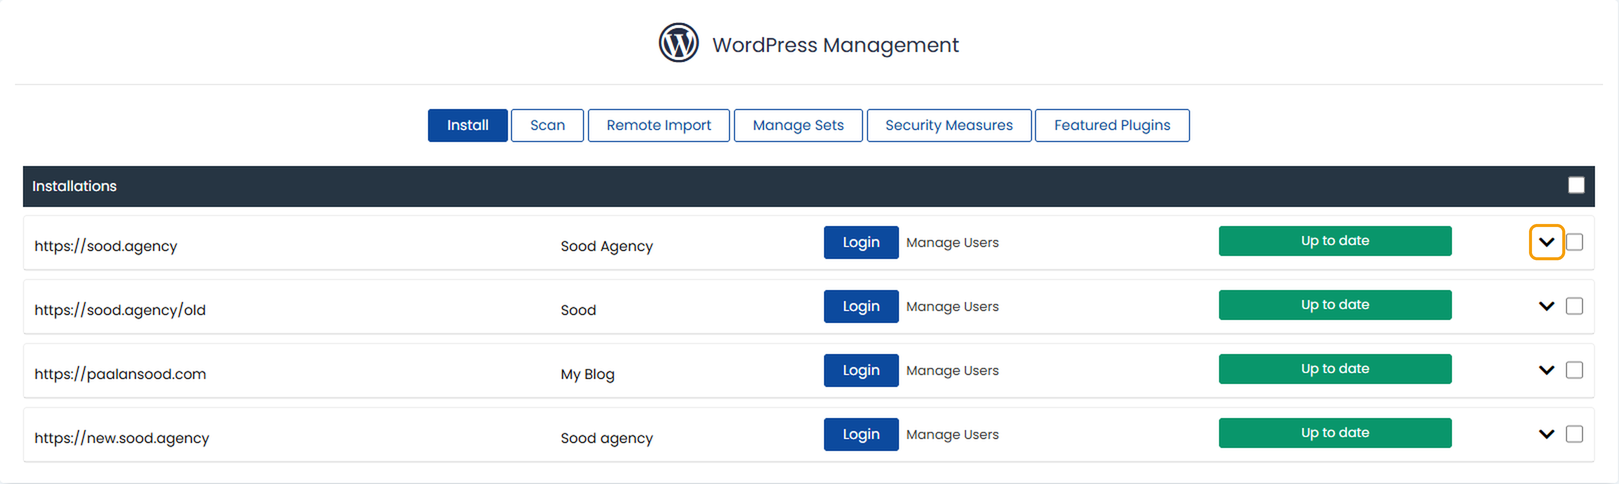
- Scroll to the buttons at the bottom of the panel. You'll see Clone and Staging.

If your site isn't in the list, see If your site isn't listed below.
Creating a staging site
- Click Staging.
- Under Choose Installation URL, choose where the copy will go. The simplest option is a folder on your own domain: leave the domain as it is and type a folder name such as staging in the In Directory box. If you'd rather use a subdomain, such as staging.yourdomain.co.uk, create the subdomain first and then choose it from the domain list.
- Leave the database name as it is.
- Tick Disable Search Engine Visibility, so the staging copy doesn't appear in Google.
- Click Create Staging.
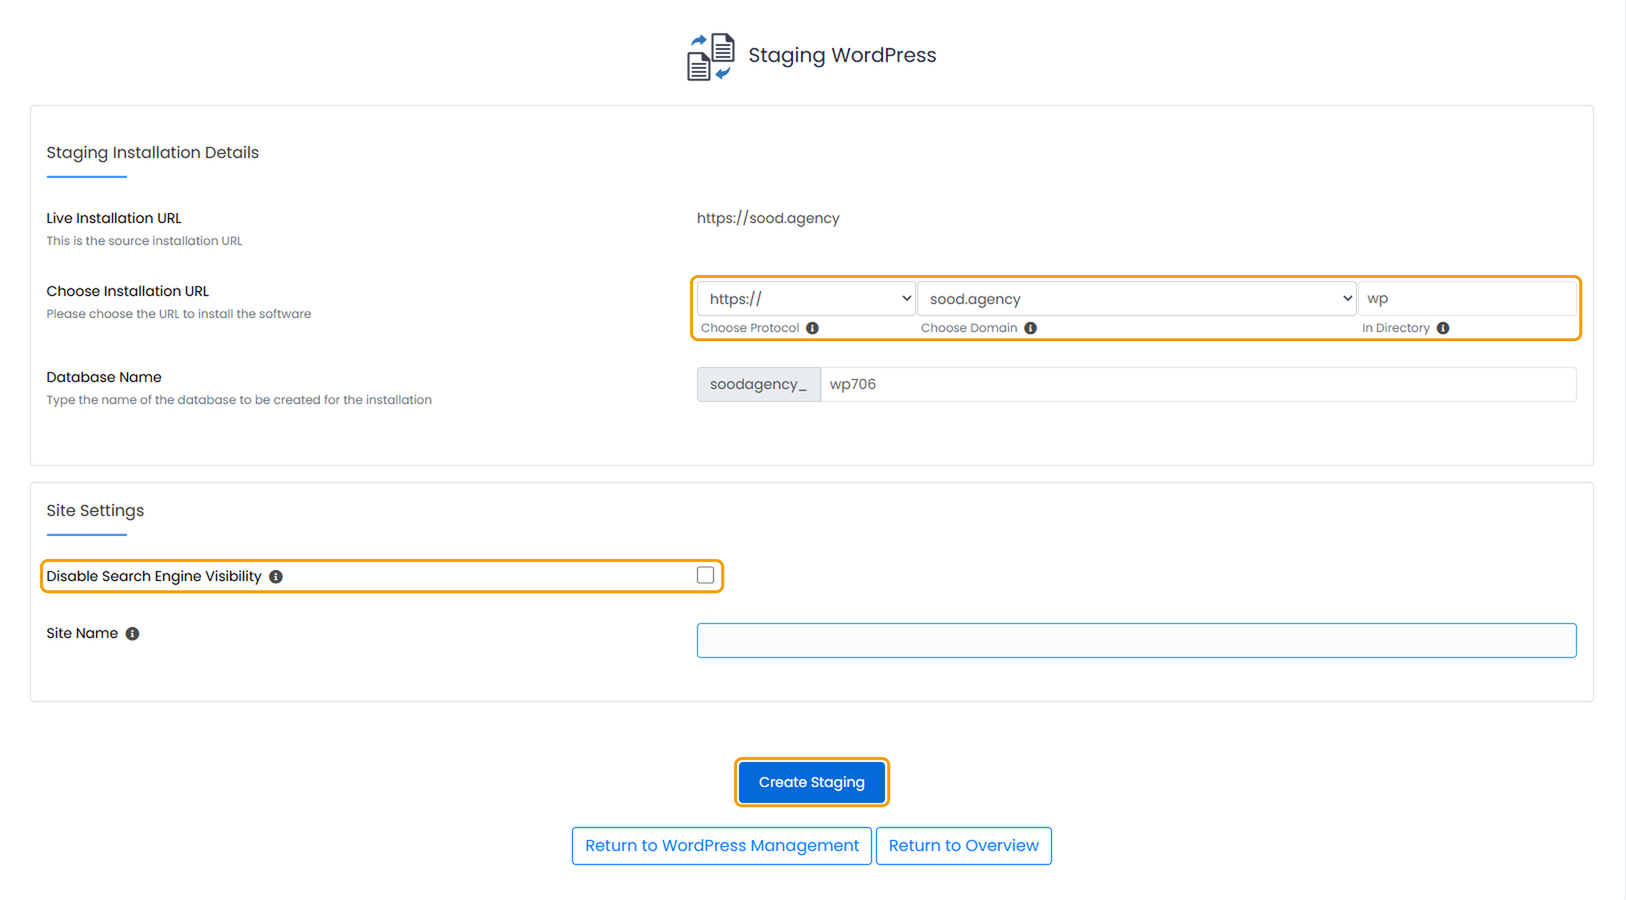
It can take a few minutes. Your staging site will then appear in the WordPress Manager list, and you can log in to it in the same way as your live site.
Pushing changes to your live site
When you're happy with the staging site, go back to WordPress Manager, click the arrow next to the staging copy and click Push to Live. Take a backup of your live site before you do this, as it replaces the live version.
Cloning your site
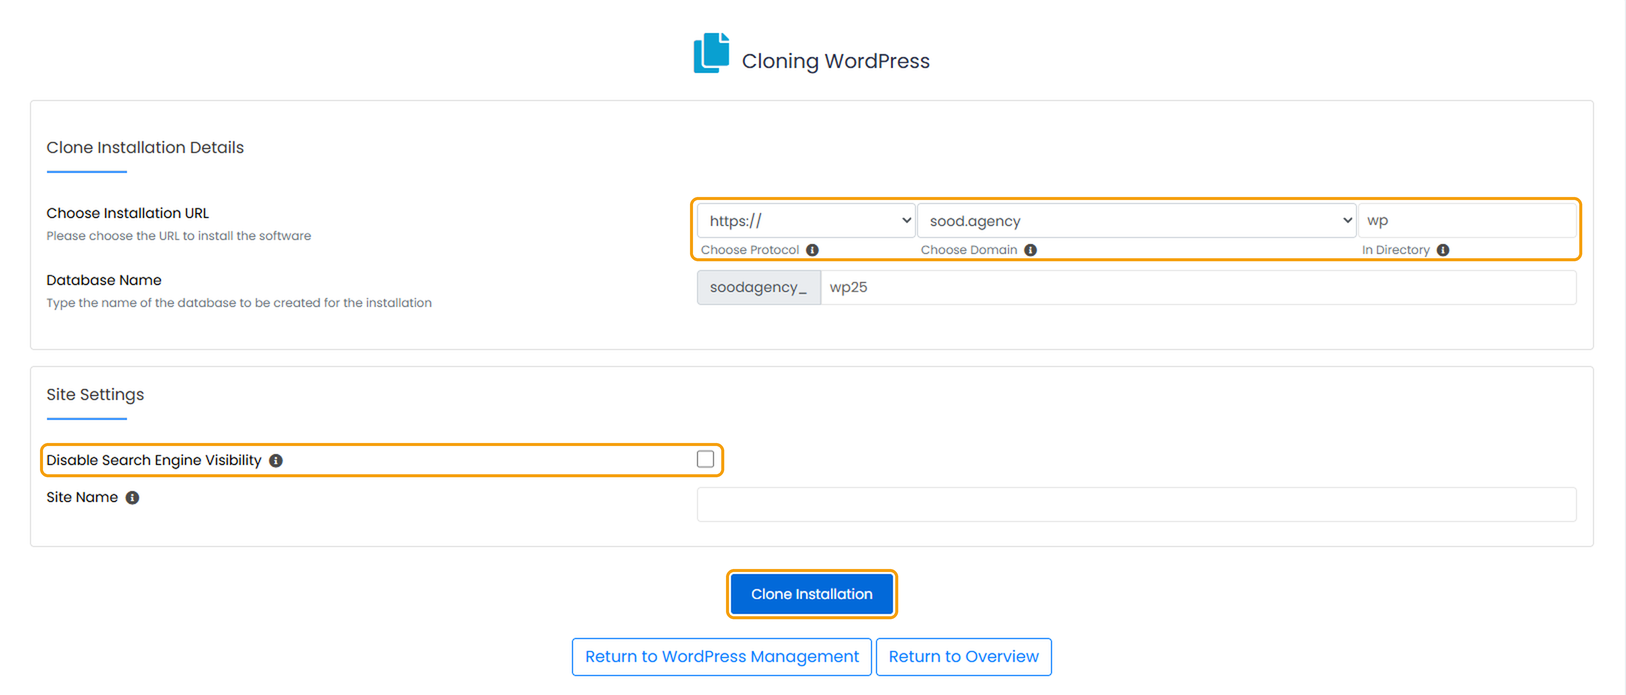
- Click Clone.
- Under Choose Installation URL, choose the domain, subdomain or folder the copy should go in.
- Leave the database name as it is.
- If the copy isn't meant to be public yet, tick Disable Search Engine Visibility.
- Click Clone Installation.
If your site isn't listed
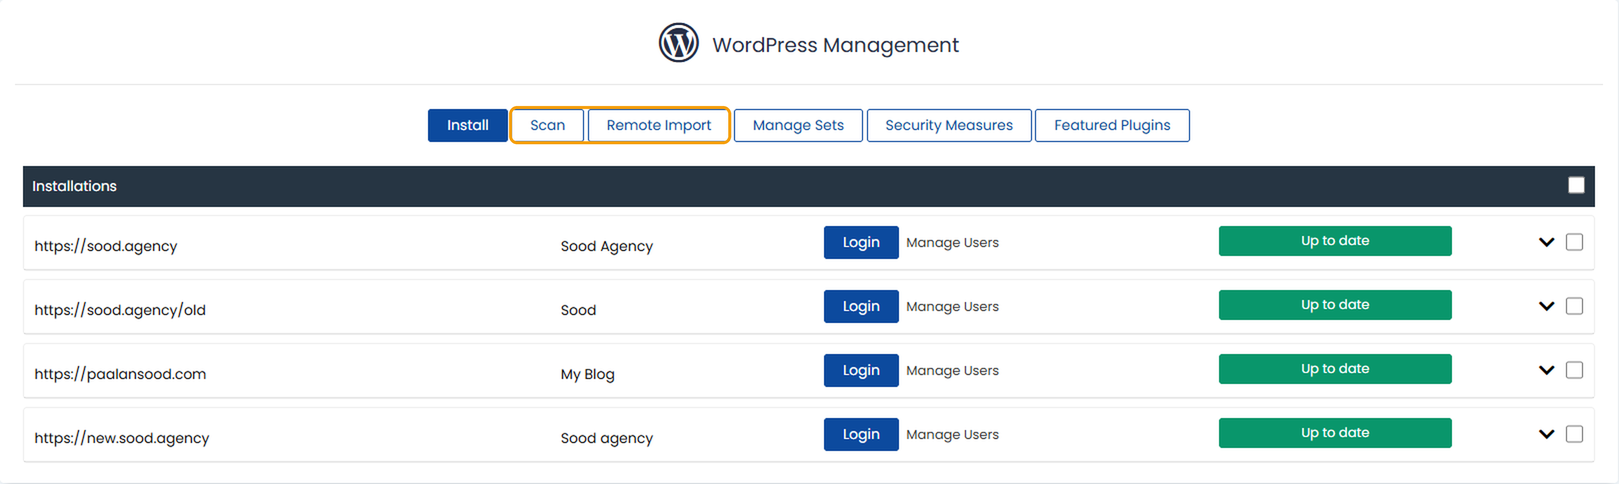
WordPress Manager can only stage or clone sites it knows about. Two buttons at the top of the page can help.
- Scan finds WordPress sites already on your hosting that were installed another way, and adds them to the list.
- Remote Import copies a WordPress site from another host onto your Barruko hosting.
If you're moving a site to us from another host, get in touch and we can help.


